Monday 18 April 2016

3D Battle Arena, Final post

I have to say I was extremely pleased with the outcome of my battle arena, the cartoon textures worked a charm, and so did the lighting effects that were included.

For effects like rain and fog, I used the particle emitter with a smoke texture for the texture that gets emitted.


Also I added in water and water flowing from the pipe to add to the scene. Sound effects were added too to make it feel like there was rain coming in from the roof. 

The statue also fitted in well, with the textures that were added. Thanks to help with the lighting in the scene I managed to pull off the look I wanted for the arena.
Added to this I also added Alpha textures around the place, such as vines and leafs that were attached to things like pillars.

That being said all the textures in the arena were painted with help of images.


I have to say I was really pleased with the outcome of the arena as a whole, the cartoon look paid off in the end and had a nice outcome.

3D Statue final post

Finally, after all the hard work my statue is done.

The finished statue


That being said though I did run into one problem before putting it into my arena. For some reason the rig I attached and posed earlier in the week didn't stay, so I had to re-rig and pose it again. However this was good experience as I was able to go though rigging again. 

I also made some tweeks to the UV map, now I added cracks and moss to the statue to make it fit into the scene more.

The UV map for the statue.

Also there was a small problem importing it into unity, the pose would not stay and the model stayed in T pose, but thanks to the help of Phill the problem was resolved and I was able to re-import it again.

Final render of the statue in the arena.


In the end I have to say I was quite proud of the statue, as it turned out better than I thought it would. 

Sunday 17 April 2016

3D, blending textures

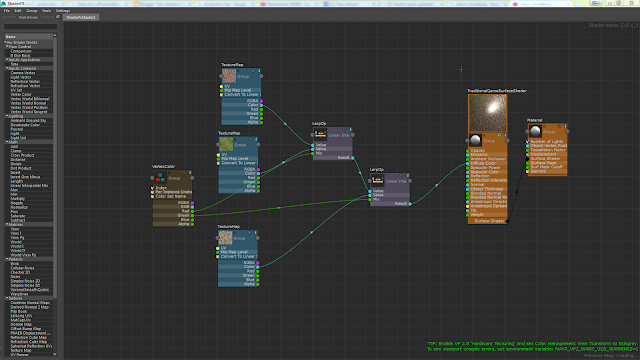
In class we were taught how to blend textures using Maya and shader fx.

Below is my shader fx window that had rock, grass and mud assigned to it.


Below is the outcome from using these textures and then painting them.


3D, Mushroom

In class we were tasked with making a mushroom.

Here is my attempt below.


Before


After I made the model following phill's tutorial, I then painted overt the UV's for the mushroom.


Below is the end result.

After

Saturday 16 April 2016

3D statue, part 6

For the final phase of modelling the statue I went about adding details to the body. Originally I was going to do this in Zbrush, but I thought it would be easier if I did it in Maya. The first thing I added was the tri hat to the model, This was actually kind of easy and I managed to make it fairly quickly, and with not that many tris.


As you can see, this is a hat.


This is also the same hat, but from another angle. 

After the hat was added I tried to make the coat and cuff links for the model.


It might be hard to see from the image, but I kind of made indents on the body that made it look like he was wearing a shirt. The cufflinks were actually really easy as all I had to do was extrude the bits near the start of the hands. Buttons were also added to give the shirt some sort of texture.


Looking at the back of the shirt, you can see that there are flaps like on coats worn by red shirts at the time. 

3D statue, part 5

After the hand and face were done, I started work on the main body for the character. The original intention way to do the main body in Maya, and then add details to it in Zbrush. But I ended up doing everything in Maya as I was terrible with Zbrush. In the end stuff like clothes, hats, and small details, were added in Maya. 


Photos of the body before clothes were added.


One of the main problems I had with making the body was trying to attack the head and hands. For instance there would be more verts on the head then there would be on the hand. Never the less with help from Phill I managed to sew everything together.


3D statue, part 3

After working on the face, and being somewhat happy with how it turned out, I began work on the hand.

Take a look at this abomination. 


Look at those fingers, don't they look freeky.
One of the main problems I had with the hands, was the fact that I could never get the fingers right., like look at them, they look like carrots or something.
That being said, I was happy that I managed to get the hand done in the end.